Showing posts with label Seasonal. Show all posts

Great Big Giant Tree of Light


I posted a picture of us doing this activity on our Facebook wall a few weeks ago, but never blogged about it.  Today my son asked me, "Mommy, can we make the great big giant tree of light again".  I didn't know what he was talking about until he ran and started pulling out the projector.  There was no "invitation", but you can very well set one up any way you like.  I used a chalk marker to draw the tree directly onto the projector....and he chose all the "ornaments".  He also added snowflakes this time (our DIY magnet snowflakes, that we made like THIS).


 snowflakes added


 adding translucent mosaic tiles as ornaments


 on the other side of the shower curtain liner checking things out


 he put the yellow square on the bottom and told me it was a present and that it had a weed eater in it


 he told me the blue piece was a jingle bell, then held it to his ear and shook it
:)


 he decided to take out the magnetic circles for more ornaments


 :)


 using magnets to "undecorate" the tree


 he really enjoyed decorating it and then using the magnets to take off the "ornaments"


toward the end he was only using the magnetic circles as ornaments and using the magnetic wand to take them off


- AK (MESE, MECD)

Illuminated Ornaments


Obviously, our children are interested in all things Christmas right now....so we have been doing more "crafts".  While an end product is suggestive, we always allow our children to lead the way and follow the path of play/creativity that they choose.  There is no right or wrong way, and its still all about the process.

We have incorporated fill-able ornaments into our play for a few years now, but one of our readers (Alicia Odom) inspired this activity when she commented on our page saying they had glued gems to their ornaments.  Cool!  Its a lot like our GLASS SCULPTURES post and our GLASS PUMPKIN post, but we had yet to glue anything to the outside of the ornaments.  So............

MATERIALS:

large acrylic fill-able ornaments
gems
hot glue gun


The invitation


Gluing on the gems

I had to stop taking pics here because my son said, "Mommy, I'm feeling nervous because last time I used the glue gun I burned my finger and had a blister.  Can you help me, please?"  So he squirt the glue and showed me where to place the gems.

First he wanted to hang the ornament without the light in it.

We added a finger light and he put it on his shelf

Then he decided to hang it from his shelf and that is where is stayed until bed time.  He moved it at bed time because he hates any amount of light in his room while he sleeping.


TIPS:

The ornaments get very heavy once you add the gems.  If you plan to hang it, you will need to hot glue gun the top on.  If you add a finger light, you will need to replace it once it burns out.  We found that it was easy to remove the glued on top, replace the light, and glue the top back on again.  If you plan to place it on a shelf or table, there is no need to glue the top on.


ENJOY


- AK (MESE, MECD)

Christmas Sensory and I Spy Ornaments

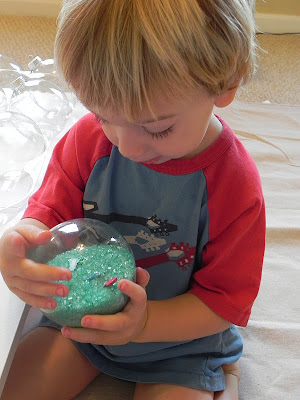
I LOVE how these turned out....but more importantly, my son LOVED the process of making them, which is saying a lot because in all honesty, he's not big on "art projects".  I have put these clear glass ornaments from Michaels in my cart on more than one occasion and I always end up taking them out....until the other day.  My son and I were reading the Christmas I Spy book and it inspired me to make these.  (We also made sensory ornaments).  LOTS OF PICS....

Things you need:
  • Ornaments from Michaels (they were on sale for 99 cents)
  • Decorative embellishments (also from Michaels)
  • Filler - We used colored Epsom Salt, poly-fil pellets, and fake snow (amongst other things)
  • Funnel
(The first step is to color the Epsom Salt.  All you do is add food coloring and mix with your hands.)
 The Invitation


 These are the decorative embellishments (from Michaels)


 Filling the first ornament with colored Epsom Salt


 Adding embellishments - for this one he added one or two of everything....except letters....true to form, he didn't TOUCH the letters at all during this activity.  LOL


 I SPY


 Moving it around and telling me "I spy....." (all of the things he sees).  He loved this!


 Another ornament - Epsom salt


 To this one he added ALL of the snowmen and snowflakes and told me it was his "snowy ornament"


 "Snowy Ornament"


 Checking it out


 Adding fake snow.  The snow didn't fall like the salt, so he used a pencil to poke it all down....quite a process and he was so focused!


 Adding bells and candy canes


 The last I SPY ornament was full of poly-fil pellets and the embellishments 


 checking out the ornament with poly-fil pellets and telling me the things he sees


I SPY ORNAMENTS


 Making sensory ornaments.  He chose cotton, dry garbanzo beans, bells, and acorns.  We had one ornament causality....the one with the bells broke while we were listening to the sounds....and that's ok.  He told me "Mommy, this one is broken" when he shook the ornament with cotton balls inside, which I thought was hilarious.  LOL  For the others he said, "its like there's music inside!"....and we talked about the sounds.


 "We need to put them downstairs for a little while."


**TIPS - Dont put anything too hard in the ornaments....they are fragile.  For those of you with curious little ones, you might want to glue on the tops.  These are too heavy for the tree...and they sell acrylic ones (mine are glass) at Michaels as well.**

- AK (MESE, MECD)
Pony Bead Ornaments/Suncatchers

We were all set to make some more GLUE CATCHERS the other day when my oldest asked to put beads in hers.  Sure!  This is where it led us.  It's kinda a combination of our glue catchers and WINDOW ART  I was not sure how these were going to dry but they came out great!  DIY fuse beads!  

Materials:
Wax Paper
Pony beads (translucent if you want to use them as a sun catcher)
Glue
Cookie cutter shapes

Place pony beads inside the cookie cutter.  Fill up with glue and let dry!  To prevent the glue from leaking, you can place a heavier object on top of the cutter to hold it down in place.  We filled ours up just enough to cover the beads.  These took a little while longer to dry... I think 3 days??  After they were dry we flipped them over.  Before popping them out of the cookie cutter, we gave them a coat of modge podge just to make sure they would stick.  I'm not sure if we needed this or not but my daughter was so excited about these I really wanted them to work!  


My 21M old filling hers up with glue.  She could care less about the beads.  She just wanted to squeeze!  


My oldest filling hers up with beads


Pouring glue over top


Finished...  Still need to dry them.


Dried and up in the window!  It was not sunny today but you get the idea.  :-)  To hang them we just cleared out a hole in one of the glued pony beads.  I used floral wire to hang them because we will eventually transfer these to the tree when it's up!  


Close up

RL 

Chocolate Clouds

For me, a "Christmas cookie" doesn't have to be green or red or shaped like something "Christmasy"....it just has to be made with love.....and be delicious!  These cookies are sooooooo good.  My son and I made two batches today and each batch made around 35 cookies.  Not only are they good....they are so easy to make (which comes in handy when you have culinary challenges like me!).

Im not sure where the recipe is from....I know I got it from somewhere a few years ago, I just dont remember where.


  • 3 egg whites
  • 1/8 tsp. cream of tartar
  • 3/4 c. sugar
  • 1 tsp. vanilla extract
  • 2 tbsp. cocoa
  • 1 bag of semi-sweet chocolate chips
In a mixing bowl bowl beat egg whites and cream of tartar until soft peaks form. Gradually add sugar and vanilla and continue beating until soft peaks hold, sugar is dissolved, and mixture is glossy. Sift cocoa into the bowl and gently fold until combined. Fold in chocolate chips.  Use a spoon to drop plops of mixture onto sprayed cookie sheets. Bake at 300 for 35-40 minutes or just until dry. Carefully peel off paper, cool completely.  (We baked our 30 minutes)


 using the mixer to beat the eggs


 licking the beaters is a must


 YUM!


 hee hee
(Im not sure what inspired the headband wearing but he's had it on for two days!  LOL LOL)

 ready to go in the oven


This is our second batch cooling....the first batch didnt crack like this, but no worries - the cookies were still intact and tasted just as good.
- AK